Run SpinRite on Librem 5 Internal Storage
I have a Purism Librem 5 Linux phone. The Evergreen batch has 32 GiB of flash storage. In this post I will show how to run SpinRite on that drive.
Since this is a rather large post, a table of contents seems in order.1
- Tools Used
- Prerequisites
- Step 1: Buy SpinRite
- Step 2: Run SpinRite in VirtualBox
- Step 3: Use Jumpdrive to Access Librem 5 Internal Storage
- Step 4: Allow Virtual Machine Access to Raw Disk Drive
- Step 5: Finally, Run SpinRite on the Drive
Tools Used
- A copy of SpinRite
- VirtualBox (and VBoxManage on the CLI)
- Wine
uuufrommfgtools
Prerequisites
I use Arch Linux, so all commands and examples are run on that OS. You should be able to easily adjust the commands to your own Unix-based OS.
I have VirtualBox version 7.1.6r167084 installed. But none of the features used in this post are recent by any measure, so I would not be surprised if older versions, including 6, would work fine.2
Make sure you have the appropriate VirtualBox kernel modules installed and
loaded. This means at least vboxdrv:
# modprobe vboxdrv
Step 1: Buy SpinRite
It’s only $89 for the world’s best mass storage data-recovery, repair, maintenance and performance-enhancing tool.3
Step 1.1: Install Wine
To get the ISO image, we need to run the SpinRite Windows executable. To run
this executable under Linux, we need Wine. To install Wine, first make sure
you have enabled the multilib repository in /etc/pacman.conf:
[multilib]
Include = /etc/pacman.d/mirrorlist
Update the package cache and install Wine:
# pacman -Sy wine
Step 1.2: Extract Bootable SpinRite ISO from SpinRite Windows Binary
Use Wine to run the SpinRite Windows executable:
$ wine /path/to/spinrite.exe
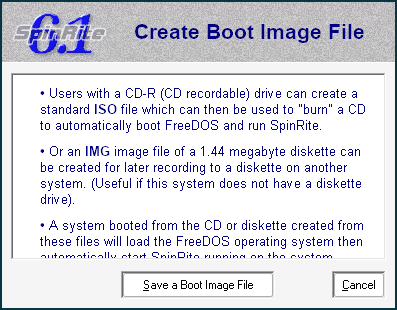
We are shown the main SpinRite installer window:

Click on “Create ISO or IMG File”:
Click on “Save a Boot Image File”:
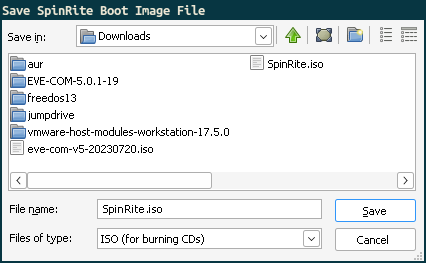
Save the ISO somewhere you will be able to find it.
Step 2: Run SpinRite in VirtualBox
Unless you are a particularly fast typist or have all the steps scripted, the GUI is the fastest way to create a new VM. But I will show the steps and commands for both the GUI and the CLI.
Step 2.1a: Using the GUI
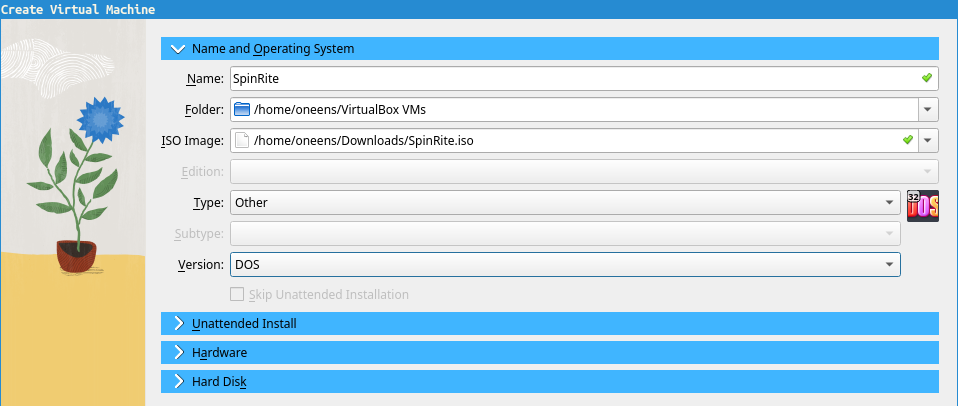
Open VirtualBox. Create a new virtual machine by clicking on “New”. Give it a name of “SpinRite”. Select the stored ISO file under “ISO Image”. The type of OS should be “Other” and the version “DOS”:
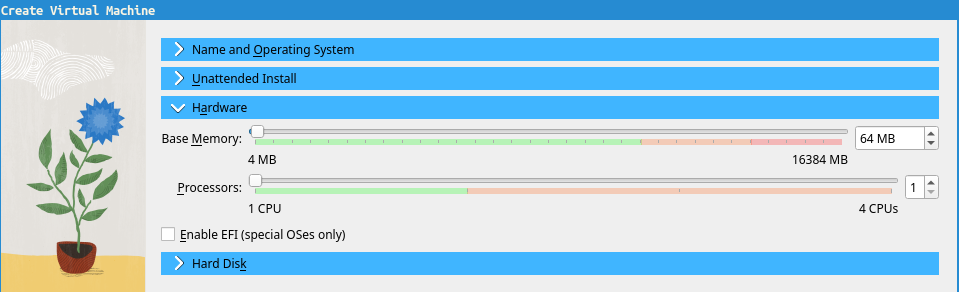
You’ll need minimal hardware to run SpinRite: choosing 1 CPU and 64 MB of RAM should suffice for version 6.1r44.
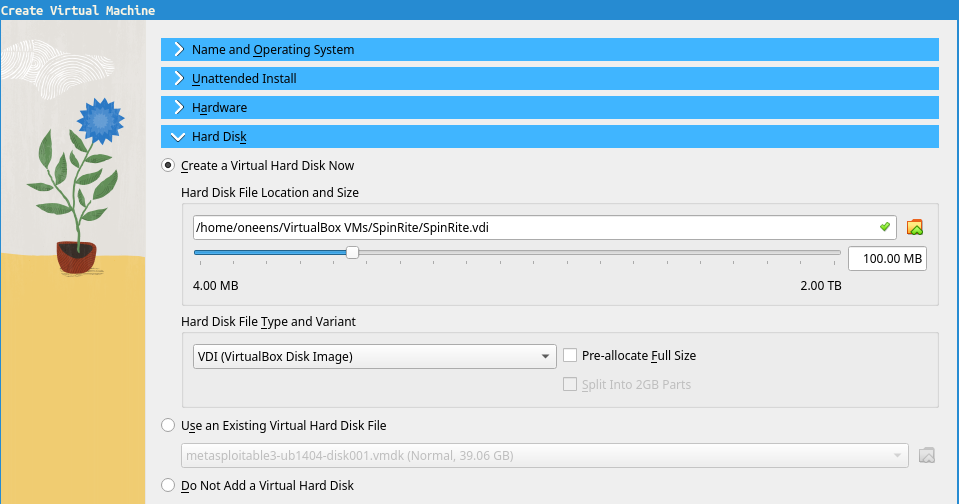
Optionally, you can add a virtual hard drive to store logs:
Step 2.1b: Using the CLI
Or you can run the following commands in your terminal.
First, create the VM. The --register option registers the VM with your
installation of VirtualBox, instead of just creating an XML config file.
$ VBoxManage createvm --name SpinRite --ostype DOS --register
You can choose to keep the defaults for memory (128 MB) and CPU (1) or modify them:
$ VBoxManage modifyvm SpinRite --memory 64 --cpus 1
$ VBoxManage storagectl SpinRite \
    --name 'SATA Controller' \
    --add sata
Attach the SpinRite ISO as a startup DVD:
$ VBoxManage storageattach SpinRite \
    --storagectl 'SATA Controller' \
    --port 0 \
    --type dvddrive \
    --medium /path/to/SpinRite.iso
Optionally, you can create a virtual hard drive for storing logs. --size
is in megabytes:
$ VBoxManage createmedium disk \
    --filename /path/to/SpinRite.vdi \
    --size 100 \
    --format VDI
Attach the virtual hard drive (on port 1 since 0 is already taken):
$ VBoxManage storageattach SpinRite \
    --storagectl 'SATA Controller' \
    --port 1 \
    --type hdd \
    --medium /path/to/SpinRite.vdi
Check your work:
$ VBoxManage showvminfo SpinRite
Step 2.2: Start the Virtual Machine
Make sure you are satisfied with the settings5. Then, start the VM:
$ VBoxManage startvm SpinRite
Waiting for VM "SpinRite" to power on...
VM "SpinRite" has been successfully started.
You should now see the SpinRite splash screen:

Step 3: Use Jumpdrive to Access Librem 5 Internal Storage
These steps were taken from the official Librem 5 documentation.
Step 3.1: Install Jumpdrive on Your Host Machine
-
Extract the tar ball:
$ mkdir jumpdrive $ tar -C jumpdrive -xf purism-librem5.tar.xz -
$ mkdir ~/aur
$ cd ~/aur
$ git clone -- 'https://aur.archlinux.org/mfgtools-git.git'
$ makepkg -s
$ sudo pacman -U mfgtools-git-1.5.201.r3.gab8dbdf-1-x86_64.pkg.tar.zst
By the time you read this, the version of
mfgtools-gitwill have changed. Adjust thepacman -Ucommand accordingly.
Step 3.2: Put Librem 5 in Flash Mode
- Fully power off the Librem 5.
- Turn off all hardware kill switches on the Librem 5 (move all to the “bottom” position toward the bottom of the phone).
- Remove the battery from the Librem 5.
- Plug in the USB cable to your Linux PC.
- Hold the volume-up button on the Librem 5.
- Plug in the USB cable to the Librem 5. The red light should blink, and you should not see the green light.
- Reinsert the Librem 5 battery. The red light will become solid.
- Release the volume-up button on the Librem 5.
If all of this seems hard, watch the video below:
Your host Linux should recognize that a USB device has been attached.
Step 3.3: Start Librem 5 with Jumpdrive
Now, for the final step, execute:
$ ./boot-purism-librem5.sh
After a couple of seconds, you should see “Jumpdrive is running” on your phone.
If you run lsblk, you should see the Librem 5 listed as a block storage
device.
$ lsblk
NAME          MAJ:MIN RM   SIZE RO TYPE  MOUNTPOINTS
sda             8:0    0 238.5G  0 disk
├─sda1          8:1    0   500M  0 part  /boot
├─sda2          8:2    0     4G  0 part  [SWAP]
└─sda3          8:3    0   234G  0 part
  └─cryptroot 254:0    0   234G  0 crypt /
sdb             8:16   1  29.1G  0 disk
├─sdb1          8:17   1   465M  0 part
└─sdb2          8:18   1  28.7G  0 part
sdc             8:32   1 119.3G  0 disk
In my case, the Librem 5 internal storage is available on /dev/sdb. How do I
know this? I looked at the SIZE of the drive. Peruse the output of fdisk -l if
you are uncertain.
Step 4: Allow Virtual Machine Access to Raw Disk Drive
Now, we need to make sure VirtualBox can work with the block device. We will create a disk image that points directly to the raw device.
Step 4.1: Create Medium from Raw Drive
From lsblk, we know the Librem 5 internal storage is available at /dev/sdb.
SpinRite works on entire devices, so I will be ignoring partitions.
$ vboxmanage createmedium disk \
    --filename=/path/to/l5flash \
    --format=VMDK \
    --variant=RawDisk \
    --property RawDrive=/dev/sdb
This creates a virtual disk image called l5flash.vmdk in the specified path.
SpinRite needs access to the raw device, so we specify --variant=RawDisk and
where it can be found.
The output is:
0%...10%...20%...30%...40%...50%...60%...70%...80%...90%...100%
Medium created. UUID: 541a980e-e201-44af-a927-6f3d83925bb0
We remember the UUID of the freshly-created medium.
Step 4.2: Attach Raw Disk to Virtual Machine
Attach the raw-disk medium to the virtual machine. Choose an empty port. If you
do not know, check VBoxManage showvminfo SpinRite to see which ports are
available. In our example, ports 0 (SpinRite.iso) and 1 (logs) are already
occupied, so we pick 2:
$ vboxmanage storageattach SpinRite \
    --storagectl 'SATA Controller' \
    --port 2 \
    --type hdd \
    --medium 541a980e-e201-44af-a927-6f3d83925bb0
Set --medium none if you want to detach the drive again later.
Step 5: Finally, Run SpinRite on the Drive
After starting the VM, the drive should show in SpinRite:
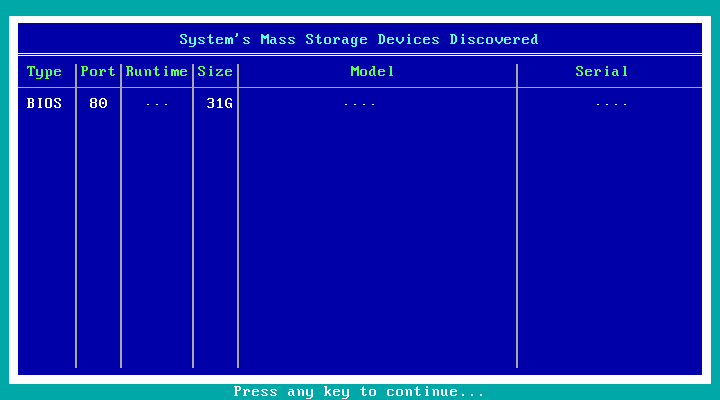
-
Incidentally, you can create a TOC from a Markdown document using
pandoc:$ pandoc -f markdown -t markdown -s --toc doc.mdThis creates a new Markdown document that starts with a TOC. You can yank it and paste it in the original document. Make sure it makes sense first, though. ↩︎
-
But if it doesn’t, do let me know. ↩︎
-
But you know that, because you listen to Security Now! ↩︎
-
After executing SpinRite, a memory test is run. The accompanying text tells us it uses over 50 MB of RAM:
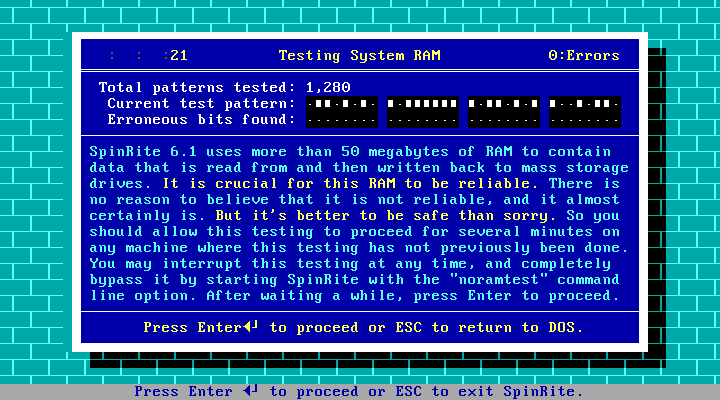
Taking into account the memory overhead of FreeDOS (640KB), you should be good with 64 MB. ↩︎
-
Personally, I like to disable things I do not use. These include NIC, audio and serial ports:
Disable network adapter 1 (and any others if present):
$ VBoxManage modifyvm SpinRite --nic1 noneDisable audio:
$ VBoxManage modifyvm SpinRite --audio-enabled offDisable serial port COM1 (and any others if enabled)
↩︎$ VBoxManage modifyvm SpinRite --uart1 off -
On PureOS and possibly all Debian-based systems it might be in the default repositories:
apt install uuu. ↩︎